Icon Bar: How To Make It with Ease
An icon bar is a horizontal or vertical list of icons associated with a site, usually displayed at the top, side, or bottom of a web page. Typically it is used to represent pages and categories on a blog or website. The icon bar lets you see which page will be accessed, and the icon itself will tell you what that page contains.
A clean and accurate menu bar makes the site navigation more friendly and intuitive. Using icons makes the navigation more noticeable and increases the search engine activity. It's a winning strategy to make your site navigation even better.
In this post, I'll show you how to create professional-looking icon bars for your website. This method doesn't use any CSS, HTML, or JavaScript code.
To make the icon bars, use the Dropdown Menu Generator. It is an online application that includes easy-to-use tools with drag-and-drop functionality, a set of ready-made templates, and a big collection of icons. You will not need to dig into HTML, find the purpose of CSS classes, adjust for browser compatibility or use the graphics editor.
Classic Icon Bar
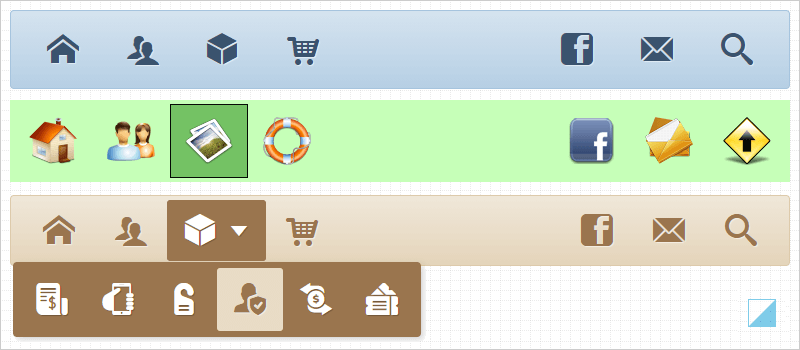
It is a standard single-level menu based on icons in the horizontal or vertical orientation. Usually, it includes the common links: Home, About Us, Products & Services, Contact Us and Search.
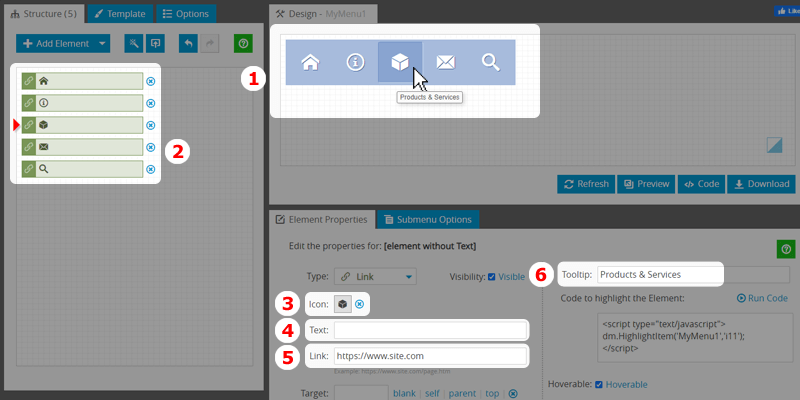
To create such a navigation bar (1), go to the Menu Generator and add the elements (2) under the "Structure" tab. Set the corresponding icon for each element (3). Leave the "Text" field empty (4). Add URL to each element (5). Add tooltip texts (6). The tooltip is a small box that appears when the user moves the mouse pointer over the icon. The tooltip text can provide more information about the element.
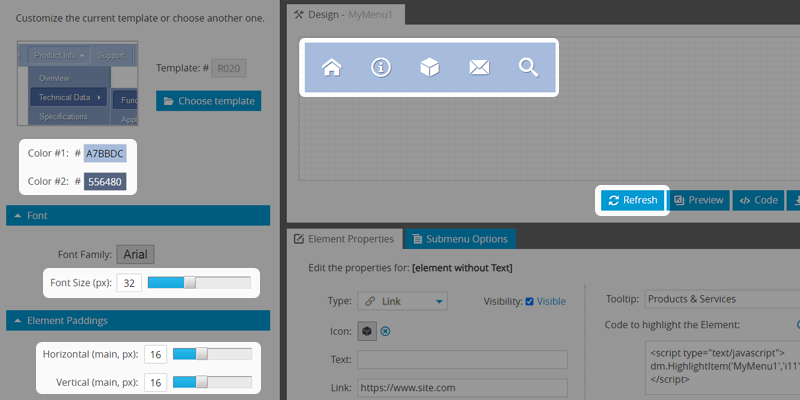
Also, it is recommended to choose the colors, set paddings, and font size so that the appearance of the icon bar matches the look of your website. For better performance, the icons are vector graphic elements conbined in a single font object. To see the final result in the "Design" Window, click on the "Refresh" or "Apply Changes" button.
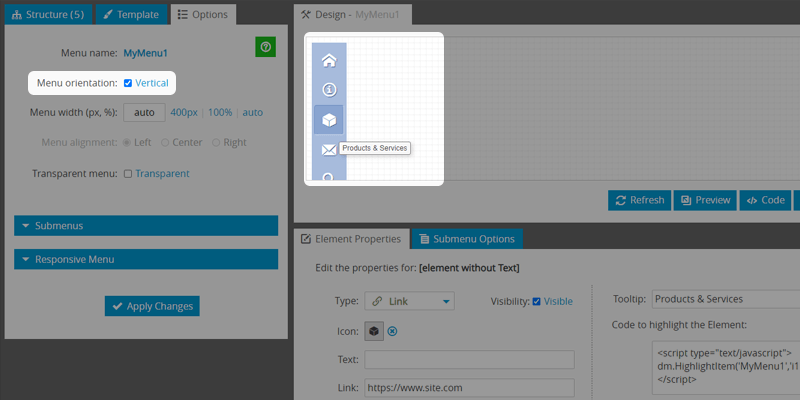
If you want to set the vertical orientation, set the corresponding checkbox under the "Options" tab.
Icon Bar with Subnavigation Menus
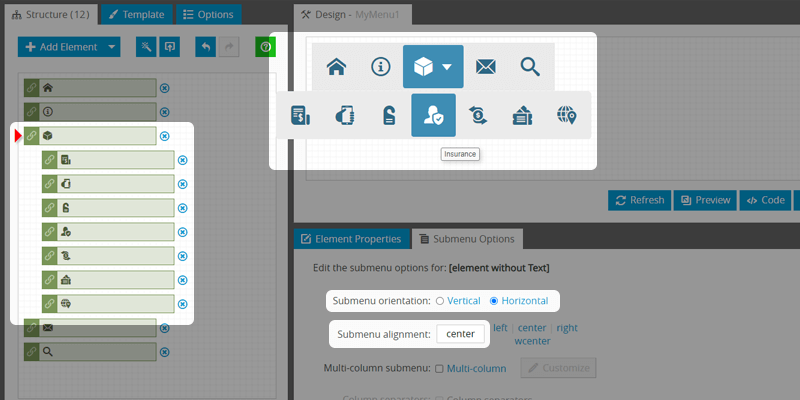
In most cases, a single-level navigation bar does not inform a visitor about the website content. So, to be more open to users, you can add sub-navigation links to any root-level button. For our example, we can extend the "Products & Services" with the submenu.
Add the elements under the "Products & Services" with a small indent on the left. As described in the previous section, set the icons, texts, paddings, and links. By default, the submenu has a vertical orientation. To make it horizontal like the main bar, select the parent element and set the orientation under the "Submenu Options" tab. Also, you can choose the submenu position relative to its parent element.
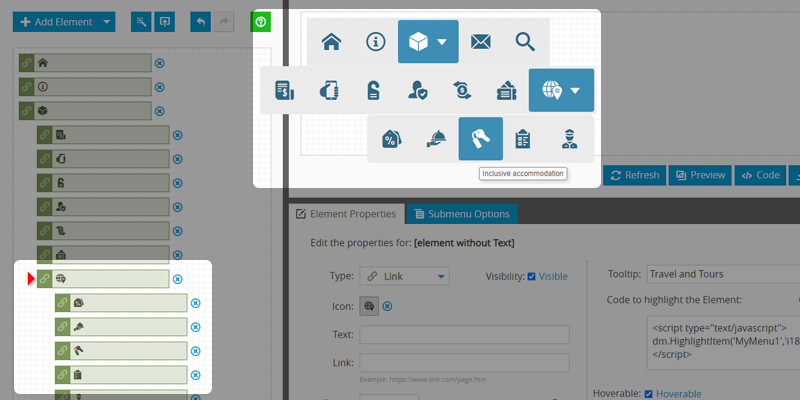
In the same way, you can make the third level of the hierarchy. With this approach, the icon bar with submenus can display the full structure of your website. This way may help users find the information they need faster and improve the user experience. Please note, however, that it is not recommended to have a menu structure with more than three levels of hierarchy.
Multi-Column Subnavigation Lists
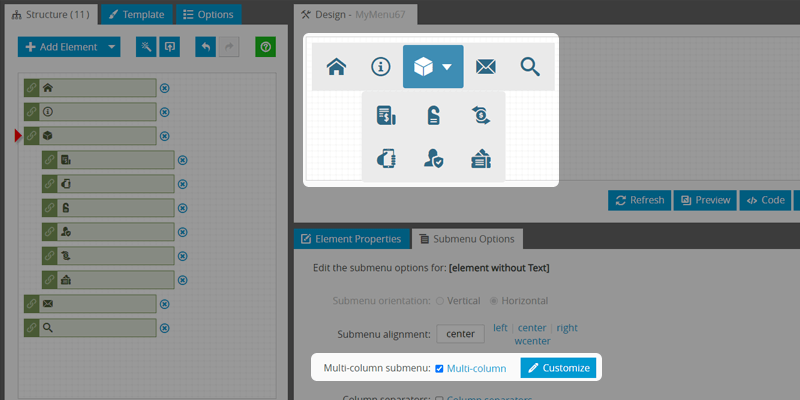
Information is much easier to read when it's organized into columns instead of a long list. This principle applies to almost any type of content, including the layout of the submenus. To split the icon list into columns, select the parent element and enable the Multi-column option under the "Submenu Options" tab. To put the elements into the desired columns, click the "Customize" button and drag and drop the icons to rearrange them.
Custom Icon Set
The application includes a basic set of the most popular icons. Of course, you can use your own icon collection. This blog post describes in detail how to create a custom icon set and apply it to the menu. In short, you need to create a collection of icons using a free online service like Flaticon.com or similar and upload it into the Menu Generator.

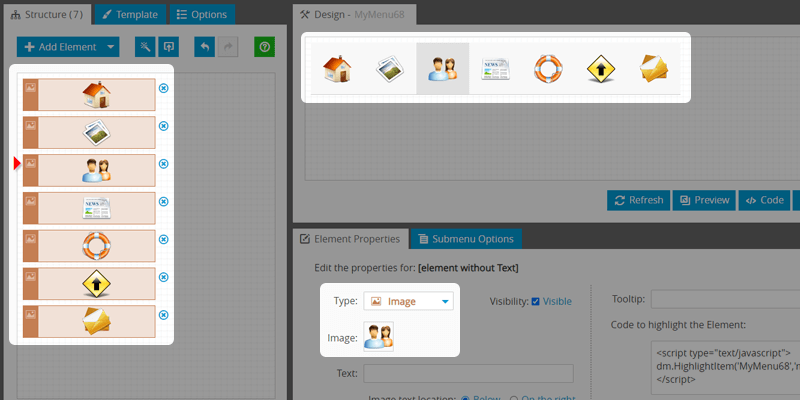
Icon Bar with Images
In terms of appearance, images have several advantages over simple icons. The main one is that pictures can be multi-colored, semi-transparent, and have shadows. If your website is about design, multimedia, or focused on a child audience, then using images may be a better option instead of using minimalistic monochrome icons.
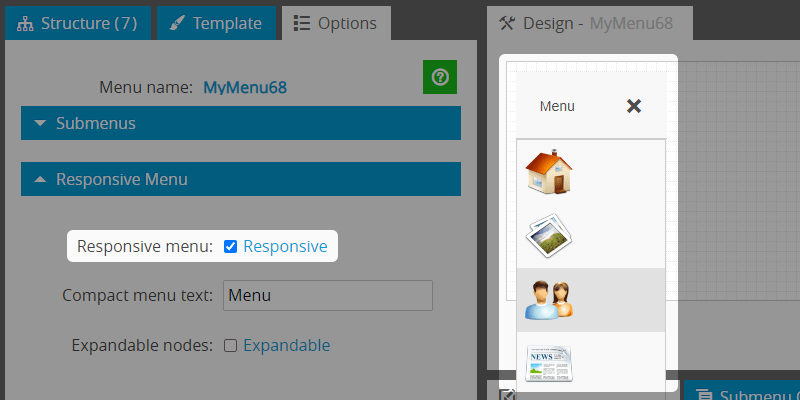
Responsive Icon Bar
A responsive Icon Bar adjusts its size based on the screen width, giving a user room to view a navigation menu within the main layout while keeping it accessible. Turn on the "Responsive" checkbox under the "Options" tab, and the navigation menu bar will resize to fit the device your visitors are using.
Summary
Now you know how to easily add custom graphics to your website's navigation, create sections and sub-sections, and style the navigation bar completely to fit your website needs. If you are still using a simple navigation menu with text links, now is the time to replace it with a modern new-generation bar with icons. Open your door to the world of looking good with the Icon Bar.
Links