How To Add Dropdown Menu In Blogger
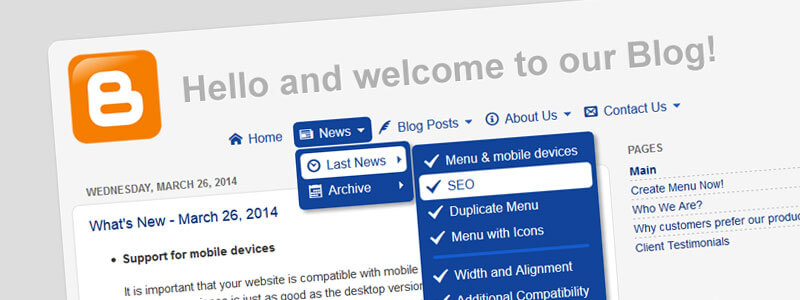
The use of a dropdown menu is a highly convenient way to navigate. Unfortunately, most blogs at Blogger.com do not have this handy feature. The main problem is that the Blogger does not include the Gadget for dropdown menus and most bloggers do not have the programming skills to work with HTML, CSS, etc.
In this article, I will describe how to add multiple-level navigation systems to your blog on Blogger. Knowledge of HTML, CSS or JavaScript is not required.
Let's start
As a starting point, I have created a simple blog at https://dropdownmenugenerator.blogspot.com/. The blog includes a few pages. Now we will add the menu to our blog step by step.
Step #1: Creating the Menu
To create the menu, we will use the online tool - Dropdown Menu Generator. The main advantage of the Generator is that it does everything automatically, quickly, easily, and gives out the professional website navigation tool which does not require additional customization. You can find more details about the online application in the post: Unusual editor - Dropdown Menu Generator.
- Setting the structure
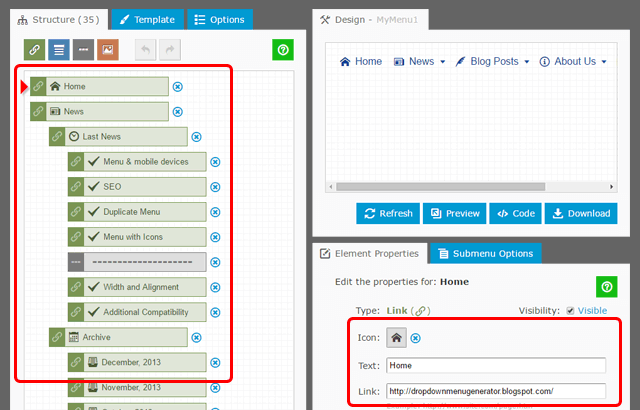
Under the Structure Tab, we define the elements: Links, Headers, Separators, and Images. The Structure Editor is based on drag-and-drop functionality. It enables you to easily create a menu structure displaying multiple levels of hierarchy. For each Link Element, we set the URL of the page which is the URL we copy from our Blogger site and paste it into the Link field in Generator.
To make our menu more user-friendly, we add an icon to each Link Element. The application includes general icons (Home, Help, E-mail, etc.), icons for social networking (Facebook, Twitter, etc.), multi-purpose icons (arrows, dots, etc.), and others.
- Setting the appearance
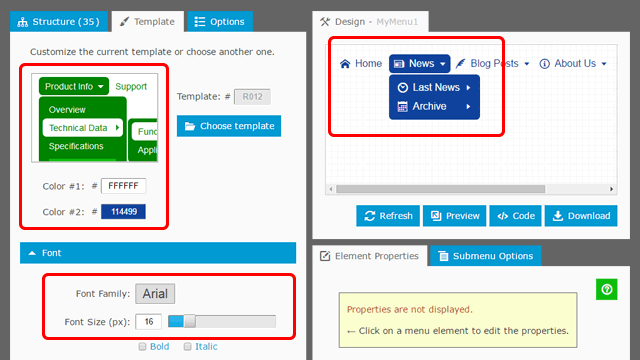
The appearance of the menu is defined by a Template. As our blog has rounded corners, we choose the #R012 template from the collection. Next, we adjust the colors and the font in accordance with the style of our blog.
- Setting additional options and getting Embed Code
Under the Options Tab, we set the width to 100%, center alignment, and transparency. Our menu is finished now.
The Generator provides unlimited hosting for your menus. All you need is the Embed Code to display your menus directly on the web pages. Any modification made to the menu in the Generator will be immediately reflected in the menus on your site.

Step #2: Adding the Menu to Blog
Now we are ready to embed our menu into the blog. We open our dashboard in Blogger and choose the "Layout". Under the Header Section, we add a new "HTML/JavaScript" Gadget.
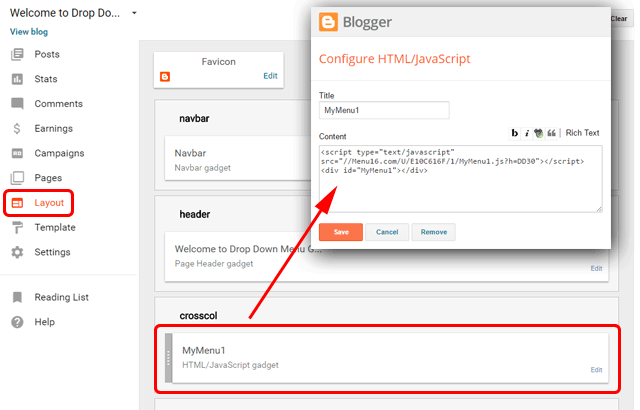
In the gadget's Content Box we paste our Embed Code:
<script type="text/javascript" src="//Menu16.com/U/E10C616F/1/MyMenu1.js?h=DD30"></script>
<div id="MyMenu1"></div>
That's All! Now we can open our blog in the browser to see the dropdown menu on the pages.
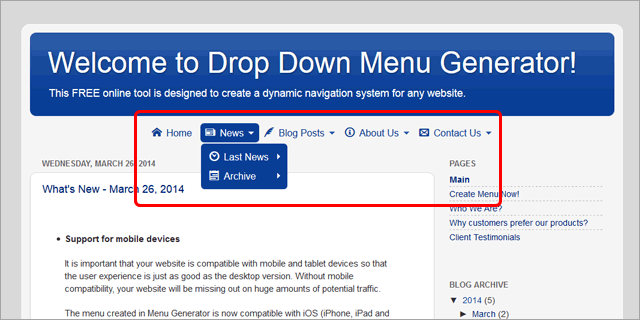
It is important to note that a single menu instance is used for multiple pages of your blog. Any modification made in the Generator will be immediately reflected in the menu on your blog pages.
The basic characteristics of the menu created in Menu Generator
- Cross-Browser Support (IE 7.0+, Firefox 0.8+, Chrome 6.0+, Safari 1.2+, Opera 7.5+, etc.)
- Multiple levels of hierarchy
- Horizontal or vertical orientation
- Multilingual support
- Nice-looking transition effect
- Real PNG shadows
- Semi-transparency
- Support for tooltips
- Submenus are displayed over Flash movies and HTML select boxes
- The code is dramatically small
- No third-party libraries (like jQuery)
- Multiple menus on a single page are allowed
Conclusion
I hope this short article will help any blogger to create a professional multi-level dropdown menu for his blog. Please do not hesitate to ask questions!
Read also
How to Add a Mobile Responsive Dropdown Menu in Blogger
Links